Going Loopy

At the weekend, I spent time with the lovely Mary Crabb at the Oxmarket Gallery in Chichcester together with other like minded ladies learning the basics of “looping.” Working with a variety of fine flexible materials, Mary weaves using adapted traditional basketry techniques to form a range of beautiful objects.

The purpose of the workshop was to explore the process of stitching to create a fabric. Mary had brought a huge range of flexible textile materials for us to play with, from fishing wire to rope, from rubber tubing to yarn made from nettles.  We experimented with working flat, working in 3D, in the round and from side to side, comparing stitch variations, materials and tension.   The aim was to play and to start developing individual items as to how we might use this technique in our own way.

Samples using a variety of materials

I am particularly interested in combining this technique with my found materials.  I may use the looping with actual found “yarns” such as fishing line, rope, electrical wire and so on but also combine the found with other yarns using them as a holder or as a mould. More play required!  For the time being, I thoroughly enjoyed just exploring what one can do with a length of yarn!


INSPIRATION ….

I now feel settled within my niche of working with found objects.  But how did I get to this point?  An early influence was Cas Holmes who creates wonderful textiles using found and recycled materials either directly or as tools (I well remember her printing with a malted milk biscuit!) and it seemed to make sense to me to re-use as much as possible in one’s creation.  Later I came across the beautiful work of Alice Fox and very much enjoyed a course with her at Studio 11 in Eastbourne.  We started each day with a walk along the shoreline collecting items that we could use – in this instance we were particularly looking for items with which we could rust-dye.  Before the class started, I was away walking along the beach each morning – there was something about the absorbing way I searched which allowed my eyes to see but my mind to wander in a creative meander.  I have never stopped!

Beachcombing Day 1.jpg
Beachcombing Day 1 at Studio 11 Eastbourne in 2016

Alice suggested that we lay out our finds so that we could take in what we had and how the pieces might work.  She also introduced us to the work of a silversmith by the name of Stuart Cairns.  Whilst I do not have the ability to make the beautiful objects that Stuart makes, he inspired me to continue to work with the found.  I do not seek to copy his work (I do not have the skill!) but I greatly admire it and so jumped at the chance to see his current exhibition which runs at “Make”, Hauser at Wirth in Bruton, Somerset until Saturday.

SC - Bound and left vessel 2 - silver, stainless stell wire, linen thread, driftwood, rose thorn and washerSC Wetlands Vessel - iron wire, driftwood, oxidised silver, bobby pin, fishhookSC Traces & Fragments vessel 2 - silver, stainless steel wire, beach pebble, found sardine canSC 5SC 3

If I had to sum up Stuart’s work in three words they would be: beautiful, delicate, fragile.  Each piece is so perfectly judged – just the right amount of detail, just the right balance between found and made.  Do have a look at his website but the objects really do need to be seen to be appreciated in full.

I would also just like to mention the work of ceramicist Elaine Bolt.  Elaine also appreciates Stuart’s work and has been supportive of me in the past.  I think you will see that same sense of balance in her pieces and the apparent simplicity of the work.  I say apparent because of course none of these artists produce their work with ease or without a great deal of hard work and study.  I tried working with porcelain with Elaine once – an unmitigated disaster!

So, I will continue to work in my own way but always admiring these various artists and makers.  They continue to inspire me and hope that you will gain something from looking at their work too.


Cyanotypes

During my Foundation Diploma in Art and Design, I produced a series of Cyanotype prints.

The cyanotype process was invented in 1842 by Sir John Herschel and is one of the historically oldest photographic techniques.  A solution of Potassium ferricyanide and Ferric ammonium citrate (green) are mixed with water separately and then blended together in equal parts.  Next (and this is the trickier part), the solution is painted onto paper or fabric to form an even coating.  Objects or negatives are placed on the material and the cyanotype is printed using UV light, such as the sun.  I worked using daylight and  herein lies the next tricky bit.  Each print will be different depending on the amount and intensity of the sunlight during the exposure time and the exposure time will vary according to the quality of light so it is an affair of trial and error.

The early cyanotype prints were of seaweed and most usual subject are leaves.  I wanted to experiment a little with the process by combining natural objects with man made items and by including other media on the paper before printing.  I was pleased with my results but was not sure how to present them.

A few months ago I came across a Victorian photograph album in a charity shop.  It was badly worn and some of the inside pages were torn but I felt it had a certain charm.  On further consideration, I decided it would work very well with my cyanotypes – the old technique sat well with the old album and the strong blues contrasted with the faded pages.

I also added a few of the papers which I embossed using lino and a printing press.

Do let me know what you think:

Beauty is in the eye of the beholder

Just a quick post as this photograph has been so popular on a Facebook Group I belong to: Beachcombing (British Coastline). I am always looking for interesting finds as I walk along the shore and a couple of frosty morning ago, I spotted this shell and saw a lovely landscape.  One of the great things about becoming an artist (whether a photographer, a textile artist, a painter, a ceramicist … it does not matter what) is that you gain “an eye” – you see so much more in everyday items.  These days where Mindfulness is big news, I think that simply taking in what is around you is a good way into “being in the moment.”


A painting in a shell Chidham Feb 2018.jpg

This is rubbish ….

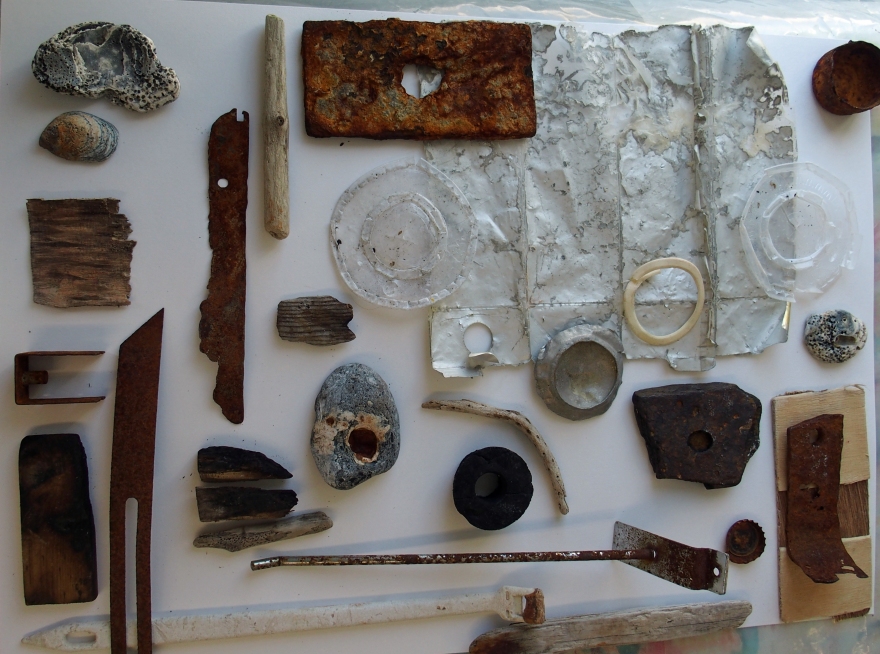
As you know, I like to collect “rubbish” from the beach.  They say beauty is in the eye of the beholder, and, for me, beauty comprises colour, texture, and composition that appeals to the eye.  Most definitions of art include the need for human intervention.  In the example below, fire and water have done the intervening.

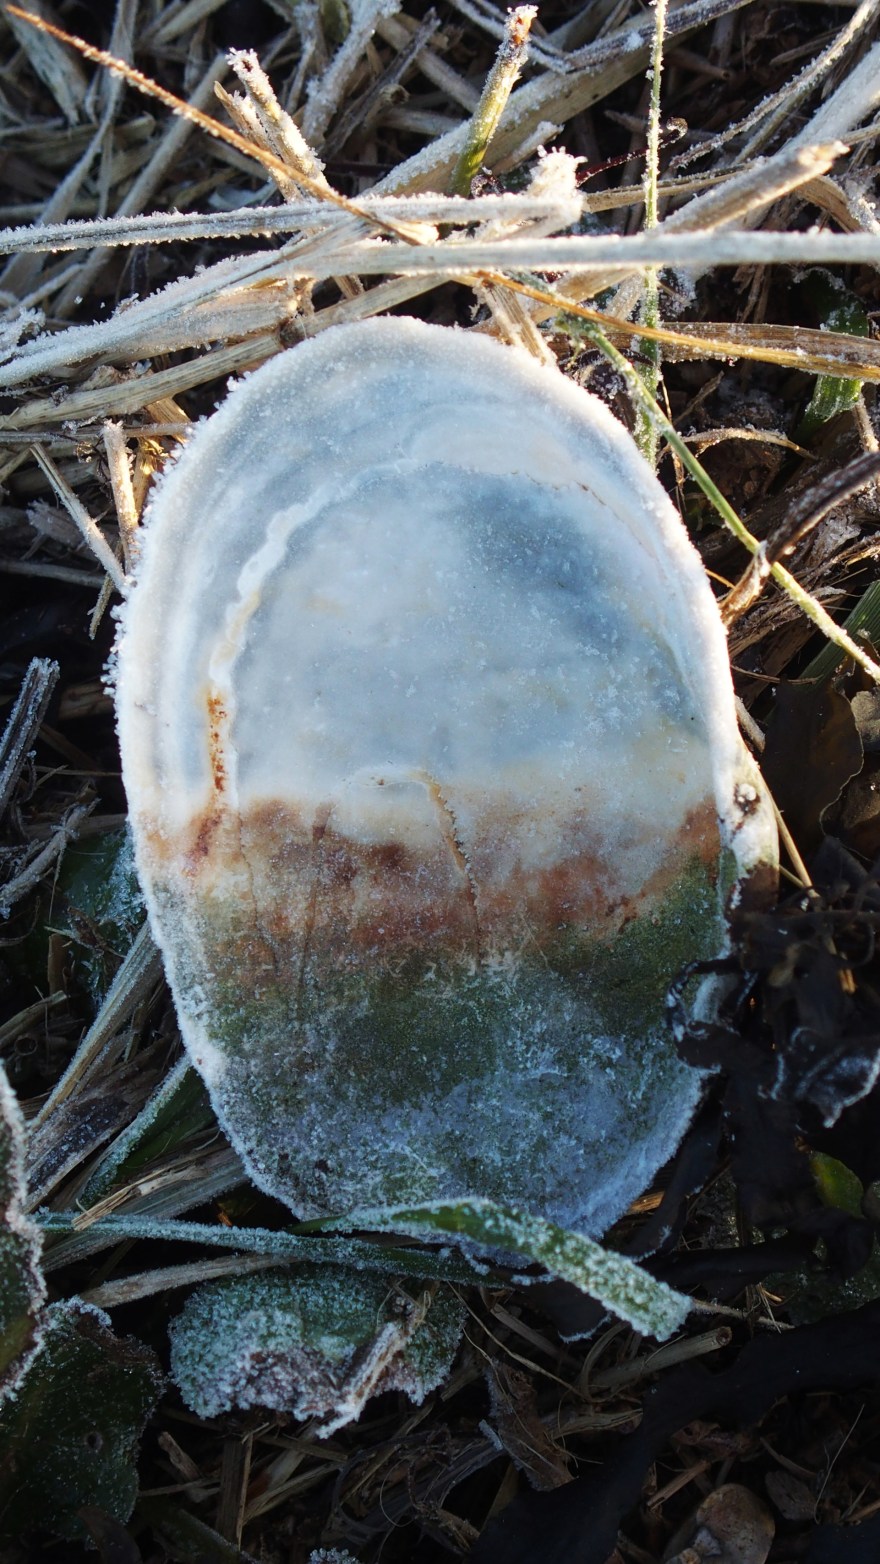
This is the found item on the beach.  It is about 10″ x 7″, weighs 270g and is quite fragile.  I first saw the dark surface and then turned it over:

I was immediately drawn to this item.  I love the complexity of texture that has been formed quite randomly by the bonfire.  I could keep looking at it for ages and keep seeing different areas of interest. There are layers upon layers and whilst it has clearly been burned, there are areas of colour in addition to the expected black and white.  It is very much in tune with my colour palette.

I have recently bought a book by the American collage artist Crystal Neubauer called “The art of Expressive Collage”.  This extract is from the Introduction:  The intuitive artist is the artist who trusts what her eye tells her is good.  She allows for the fact that she has a story to tell through art, but lets go of the notion that the story will be known before she starts working.”  And, in Chapter 1, “Do not stop to question why something has caught your eye.  If it has your attention there is a reason for it.”  This exactly echoes how I feel about my found pieces.  But what next?  First of all, here are the pieces again:

How much better they look without the visual distraction of the stones!  My constant dilemma is to ask myself “Is that enough?” and whilst I consider this found item to be a thing of beauty, going back to the definitions of art such as “The expression or application of human creative skill and imagination, typically in a visual form such as painting or sculpture, producing works to be appreciated primarily for their beauty or emotional power.” (OE) it does not fulfil these parameters because, as yet, there has been no human intervention (or at least none taken with an intention of creating art).

The two sides of the piece are, of course, different and I cannot choose one over the other. The darker side is reminiscent of bark with some lichen growing in places.  The other side includes a bit of seaweed, some metal, a twig, and plastic, foam and melted surfaces can be discerned – it reminds me of lava and also termite nests.

I would like to display this so that both sides can be seen – perhaps mounting it in a perspex box.    The question is – how, if at all, to add my intervention?  Assuming that the piece is displayed in a box, any background pattern would be too distracting unless it was very lightly done.  Perhaps a subtle pale distressed finish would be appropriate but it would have to be done in such a way as to leave the object unobscured from both sides.   Then there is the question of securing it within a box format – I can imagine it suspended but how to get anything through the structure would be a challenge.  Maybe having it on a stand would be a safer option – it cannot stand on its own as it is and I would not want to push one end into a support as it would no longer be seen.

This is puzzle to ponder over a while longer.  I may decide to stick with displaying just one face of the item and that would make the presentation a much easier process.  Any thoughts gratefully received!

I’ll let you know what I decide.  I’ll be seeing our framer next week and he may well have some ideas too.